AirPods Holster
I love my AirPods. I listen to a lot of audiobooks and podcasts when I’m working around the house on my own, and I love being able to pull them out quickly whenever I need to take a call. Their immediate accessibility is essential to their utility.
When I first got them, I generally kept them in the little pocket inside the right pocket on most of my pants. I have some other friends that keep them there as well, and while it works, it was always a minor annoyance for me. I don’t like how they feel there, it inhibits access to the main pocket — where I store my keys — and not all my pants have the pocket.
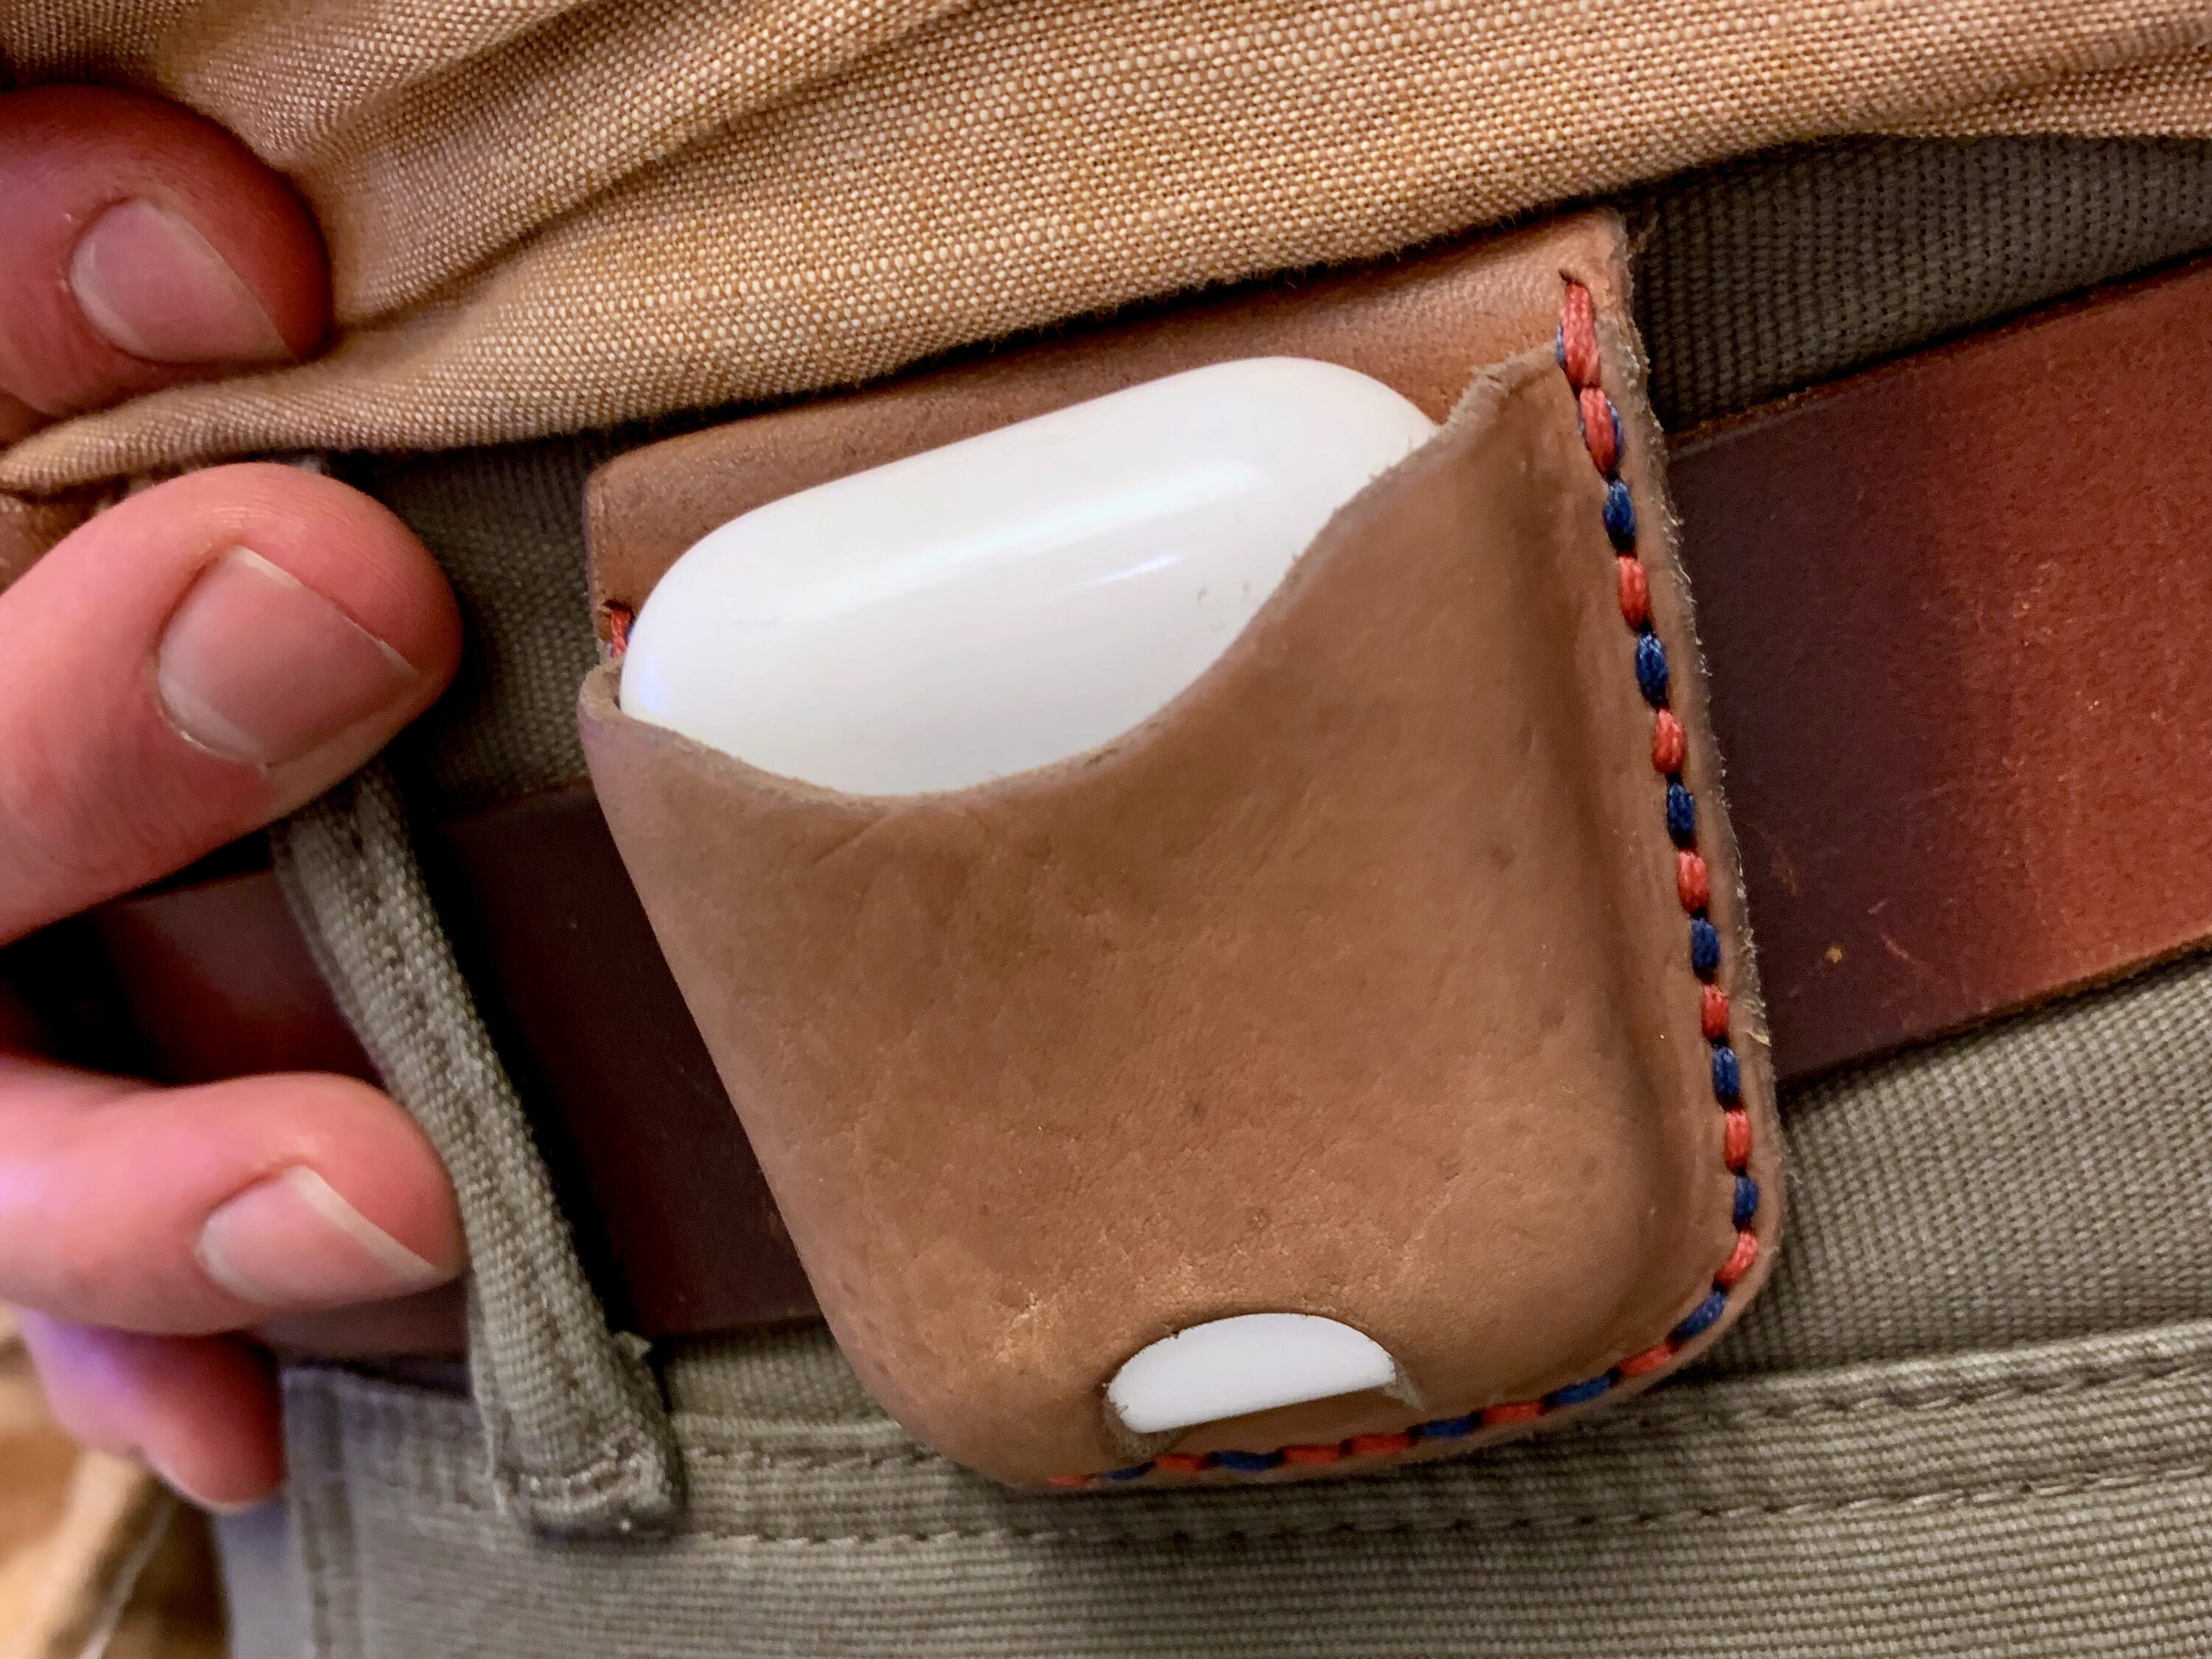
I wanted a better and more consistent way to store and hold my AirPods, regardless of what pants I am wearing, and I decided to put them on my belt.
I thought this project would be a nice place to try an alternating color stitching pattern. This kind of thing is enabled by the nature of the saddle stitch — the quintessential stitch for sewing leather by hand.
The Process
I started out with a small scrap of leather, chosen from the edge of a side of vegetable-tanned leather that I bought in Guadalajara, Mexico — a story for another day. I chose a piece that wouldn’t be suitable for a large project.
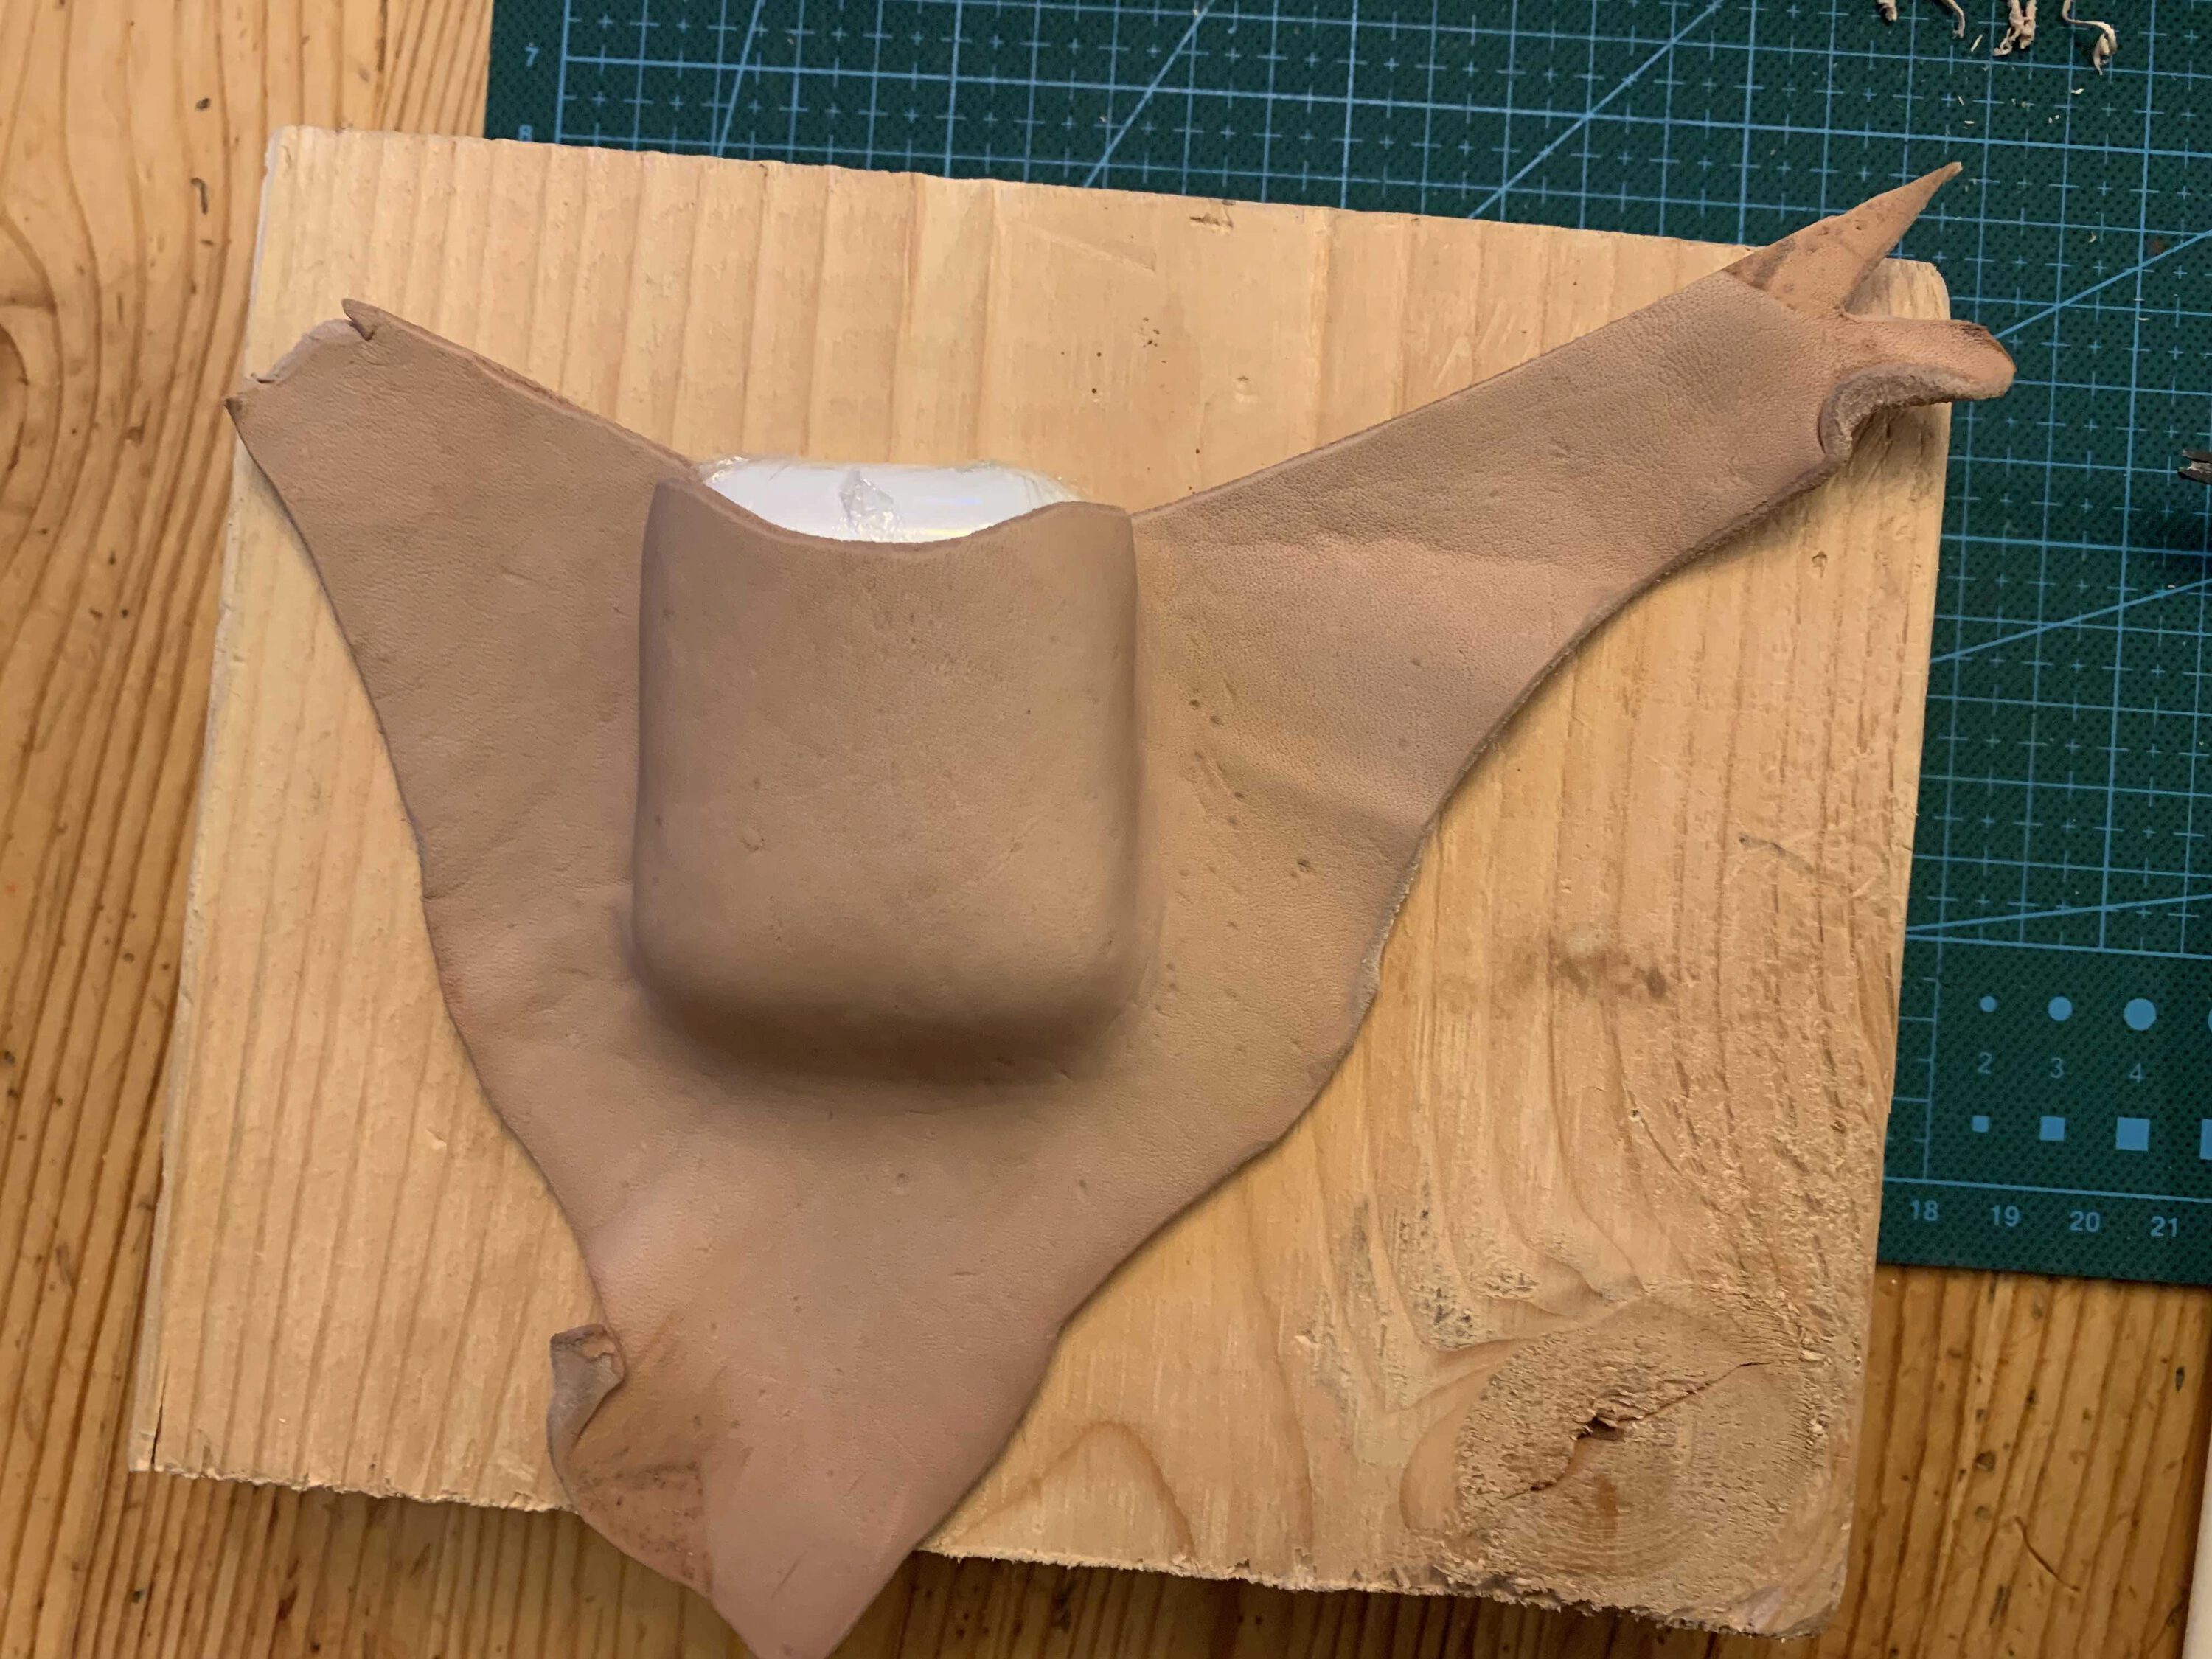
After cutting in a shape to profile the top edge, I used a process called Wet Forming to shape the leather to the case. I covered my AirPods case with some plastic wrap, briefly dipped the scrap of leather in water, and pressed and worked the leather around the case. Then, I used some scrap wood and clamps to hold the leather down in that shape while it dried. When dry, the leather maintains its shape and can then be cut down to size and stitched.
I don’t have pictures of the clamp setup, but here it is after drying.

Dried case after wet-forming. 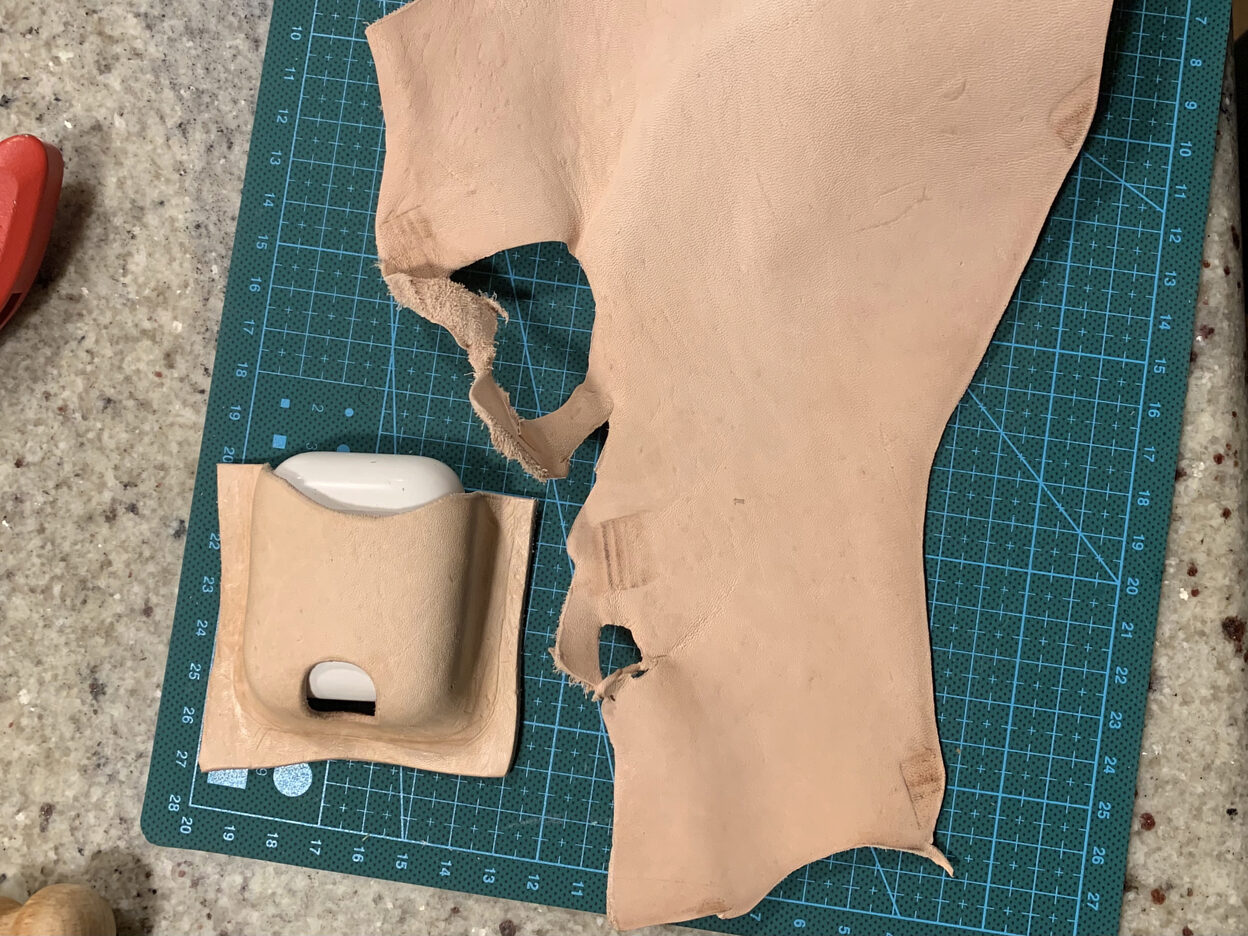
The rough-cut front piece with some uncut leather that will make up the back.

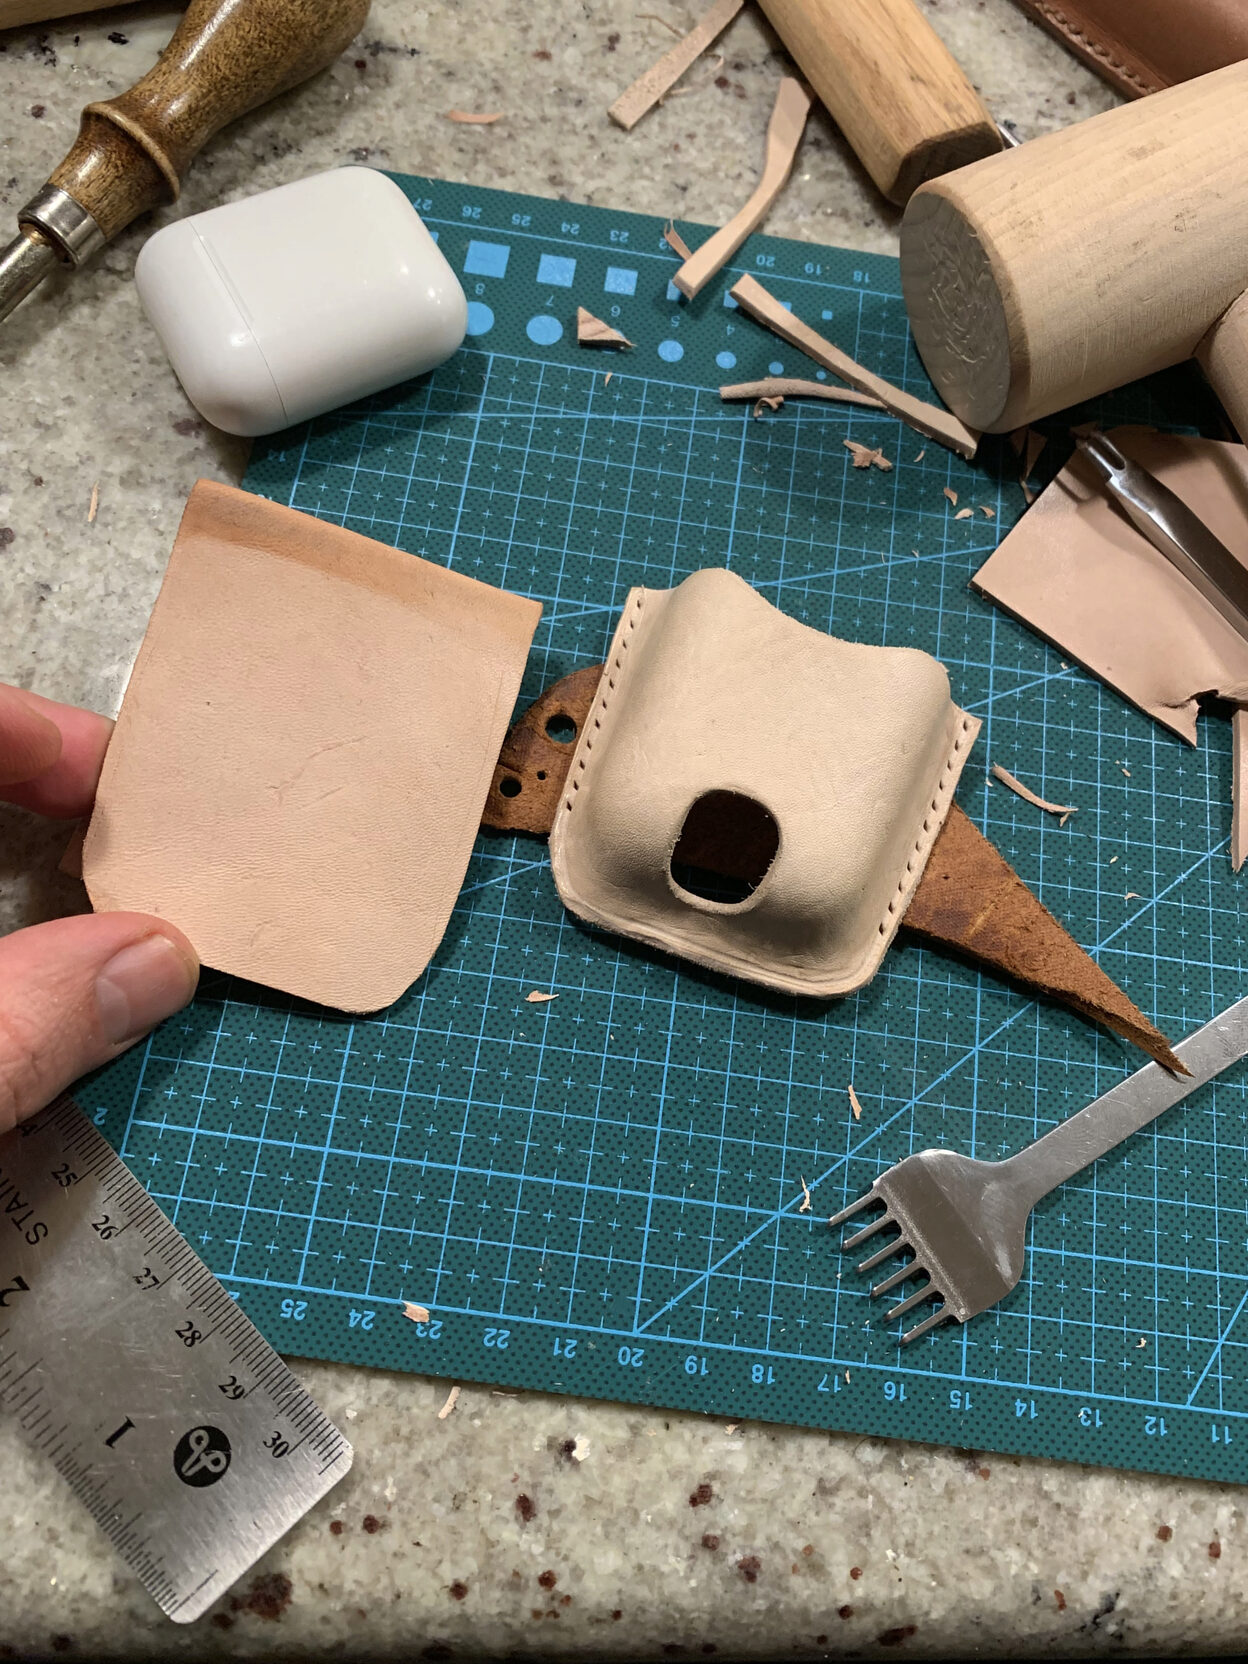
I cut out an access hole at the bottom of the case, which allows me to push the case up to remove them from the holster. I roughly cut out the entire top piece, leaving some exposed border to be trimmed after defining and marking the final edge.
It was then time to cut out a back piece and start punching holes for stitching. I selected a slightly thicker and tougher cut of leather from the same side to form the back.
I cut out a back piece a bit oversized, excess to be cut later. Here it is folded back, with the back side out of view. 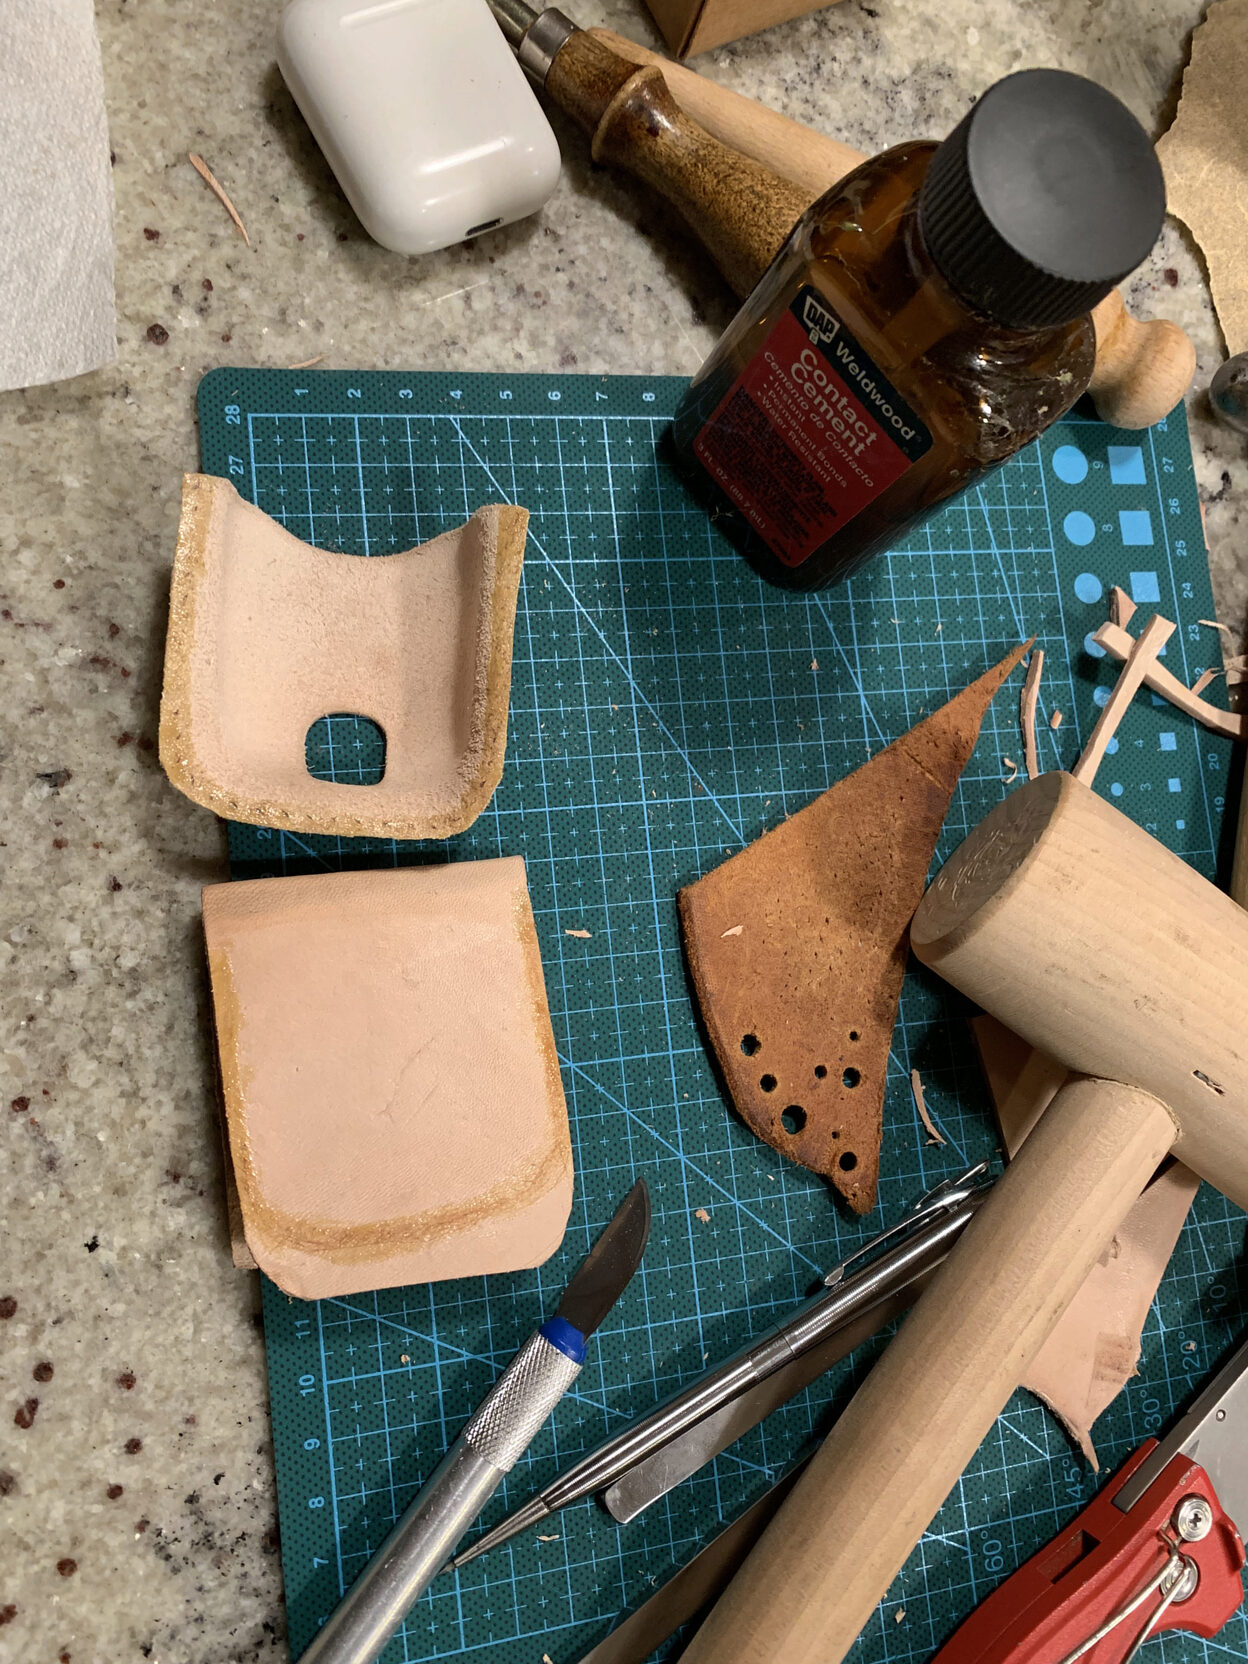
I used some rubber cement adhesive to join the top to the backing piece. Once joined with the glue, I transferred the stitching holes from the front piece to the back.


I then beveled and burnished the edges that I would not later have access to, and treated the leather with neatsfoot oil, which nourishes, softens, and darkens the leather.

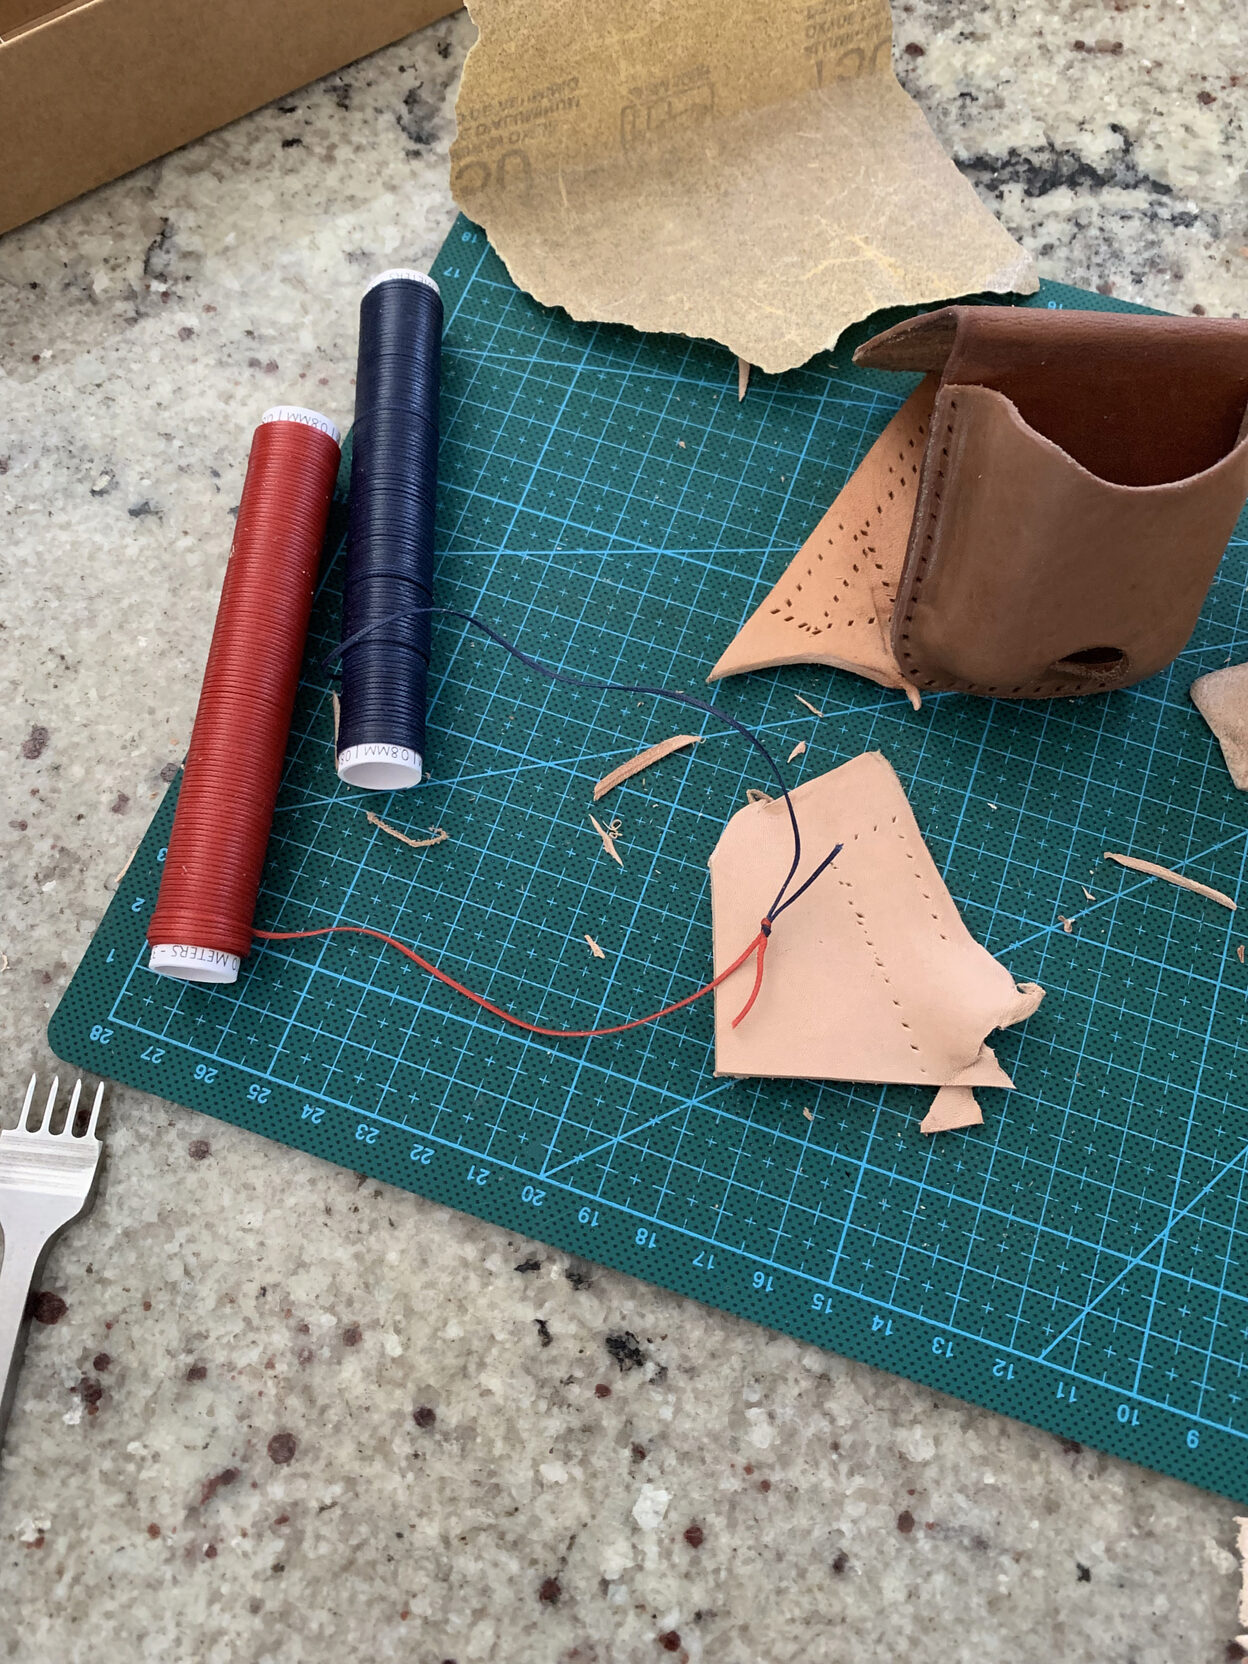
I used a simple squareknot to join the two thread colors. 
Setting up the first stitch

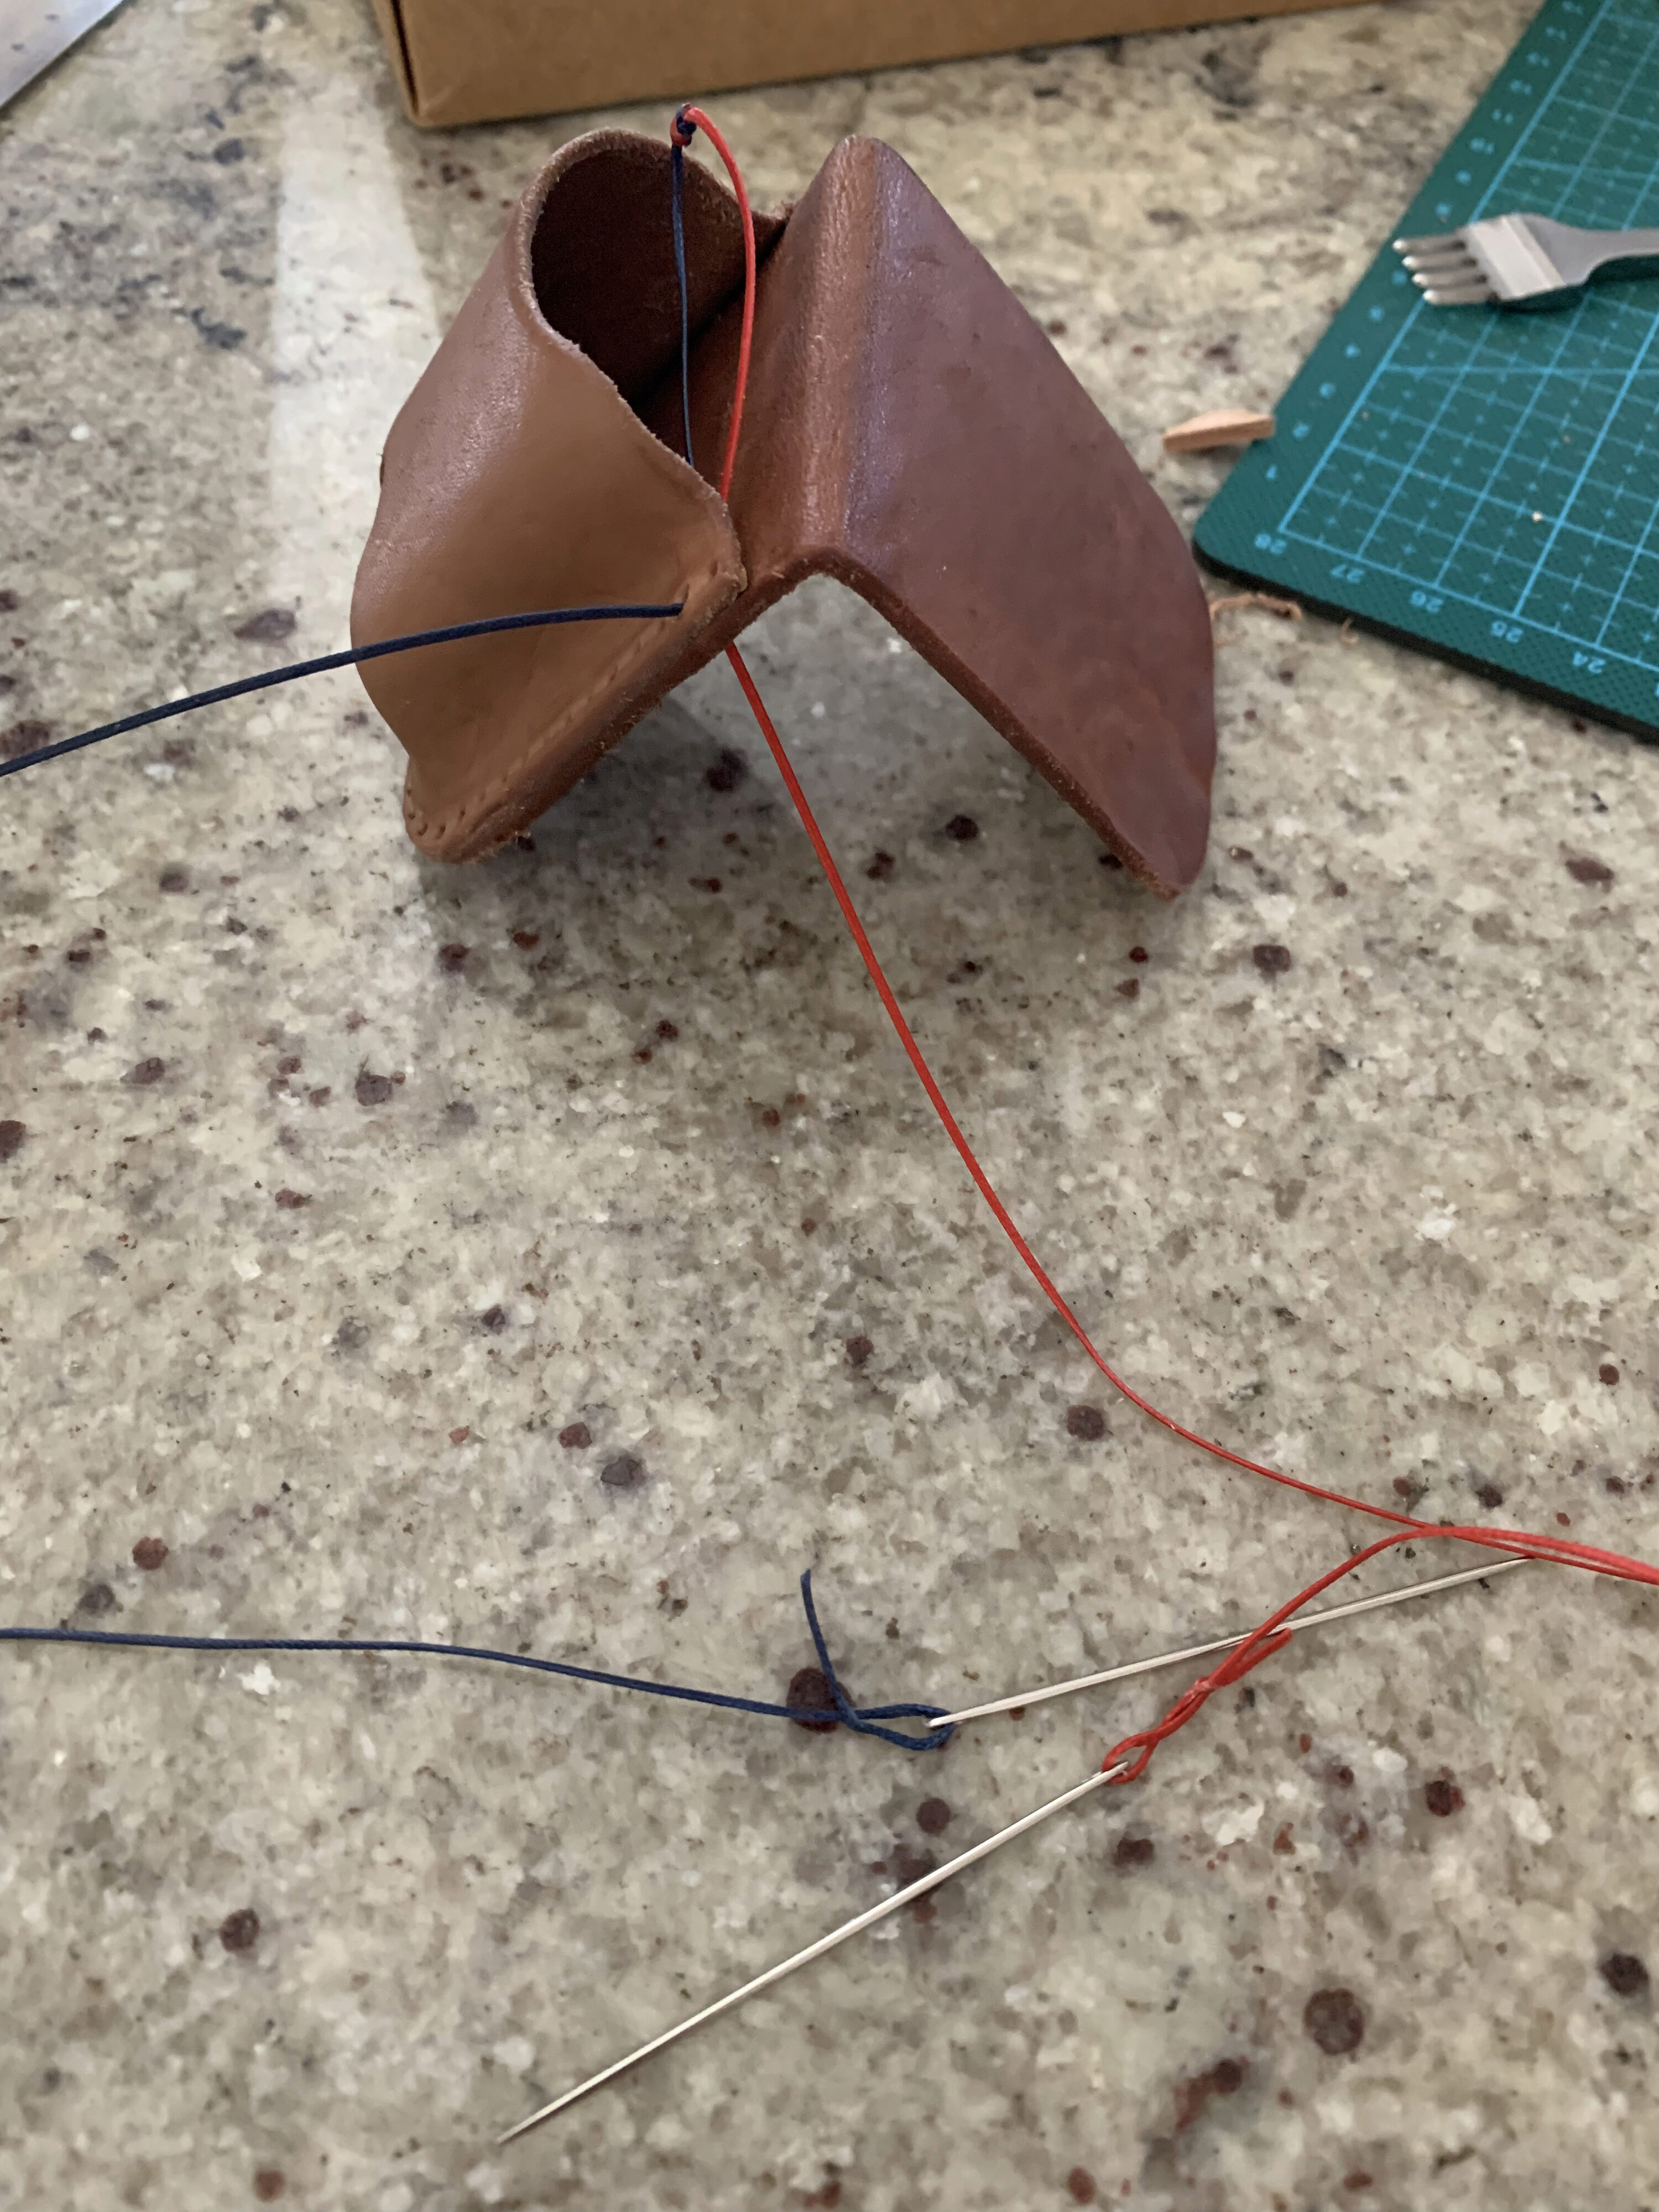
Laying out the overlapping colors on my first couple stitches. 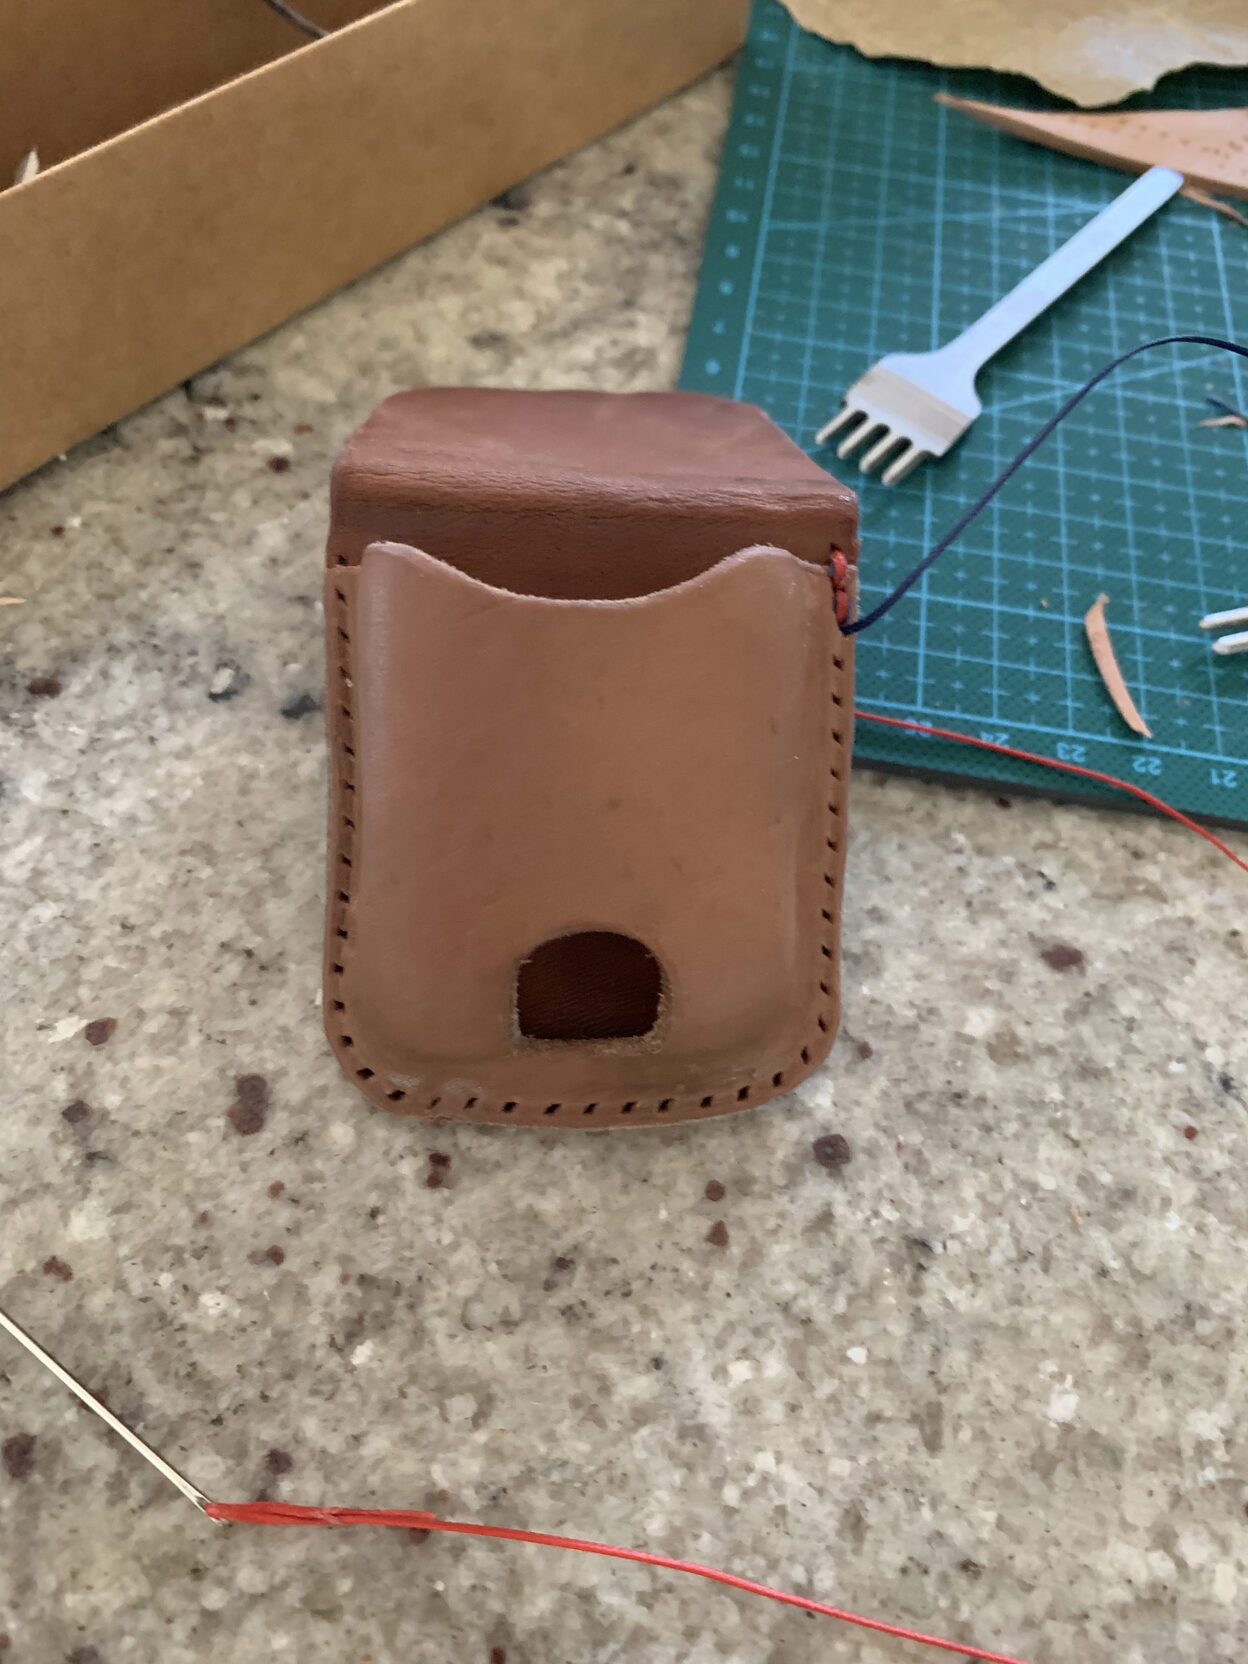
First overlapping stitches, pulled tight. 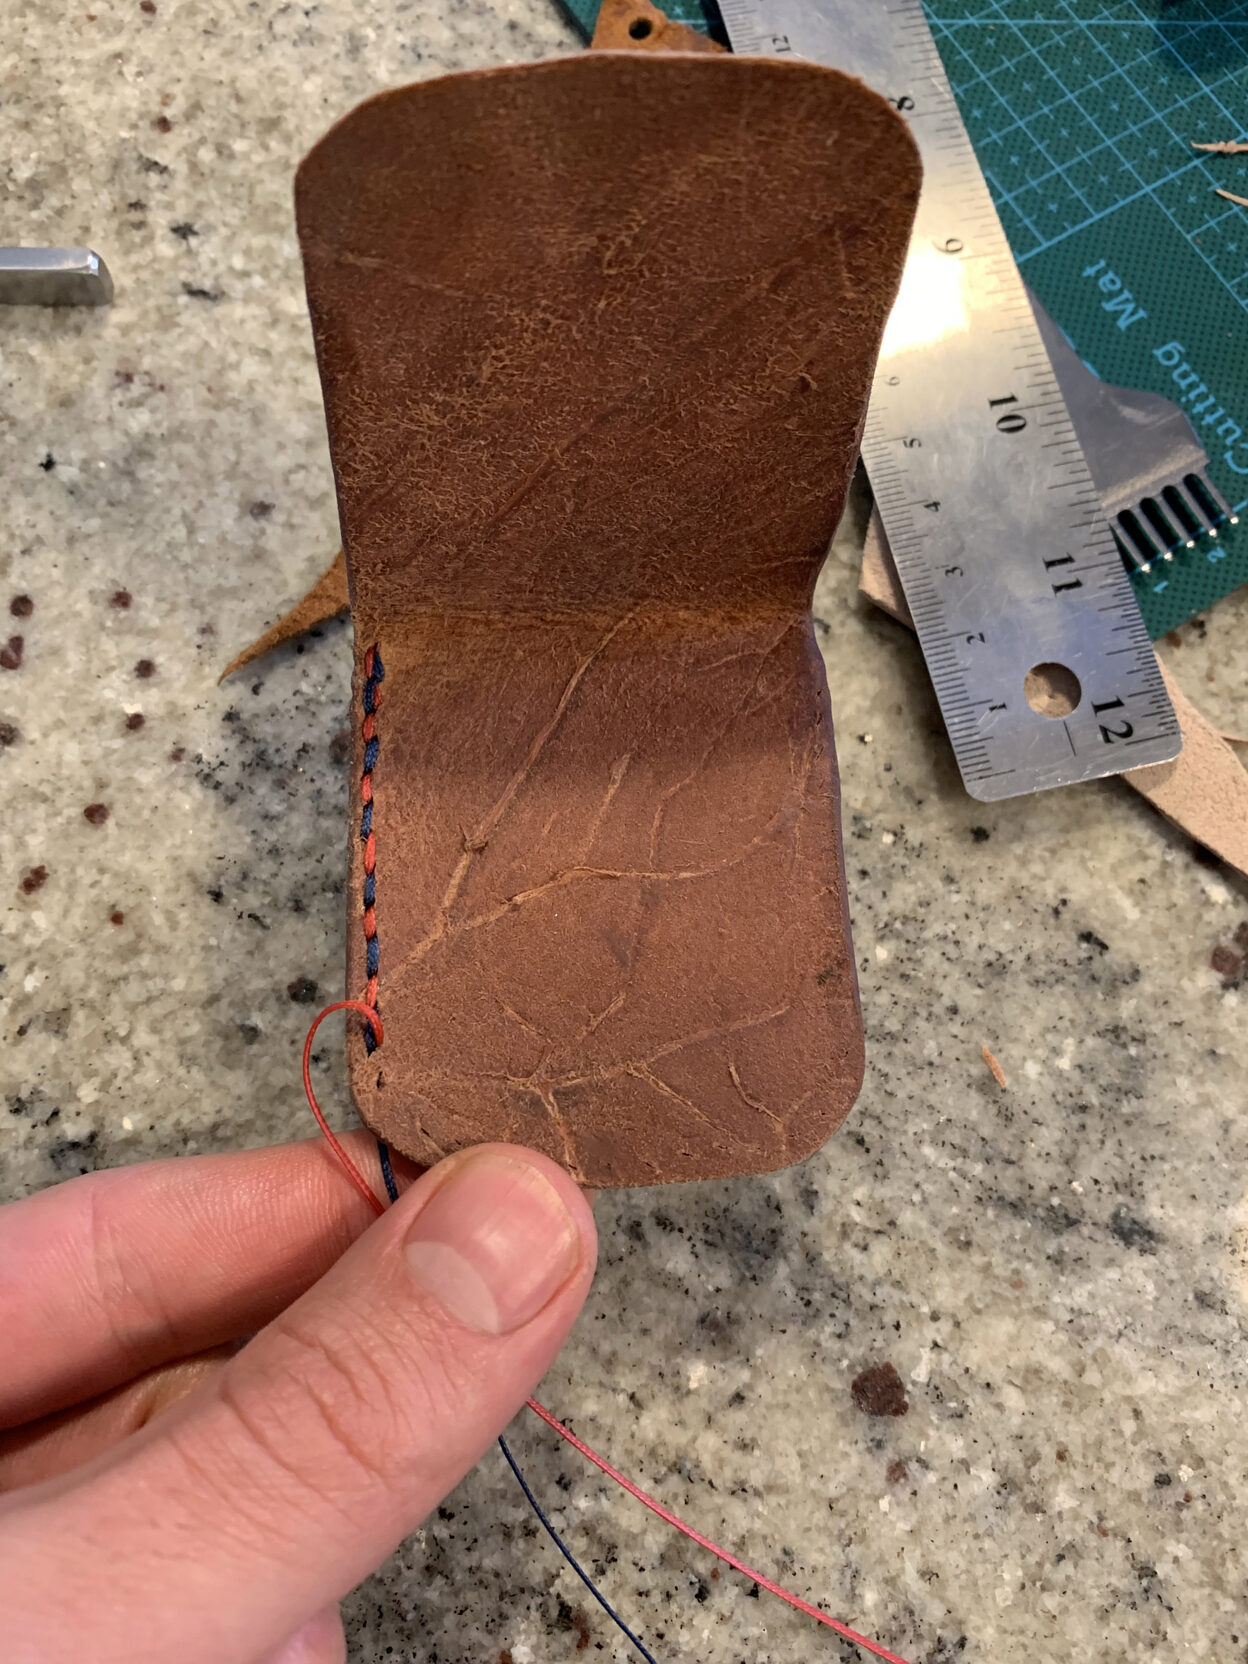
I love the grain in the back of the leather.


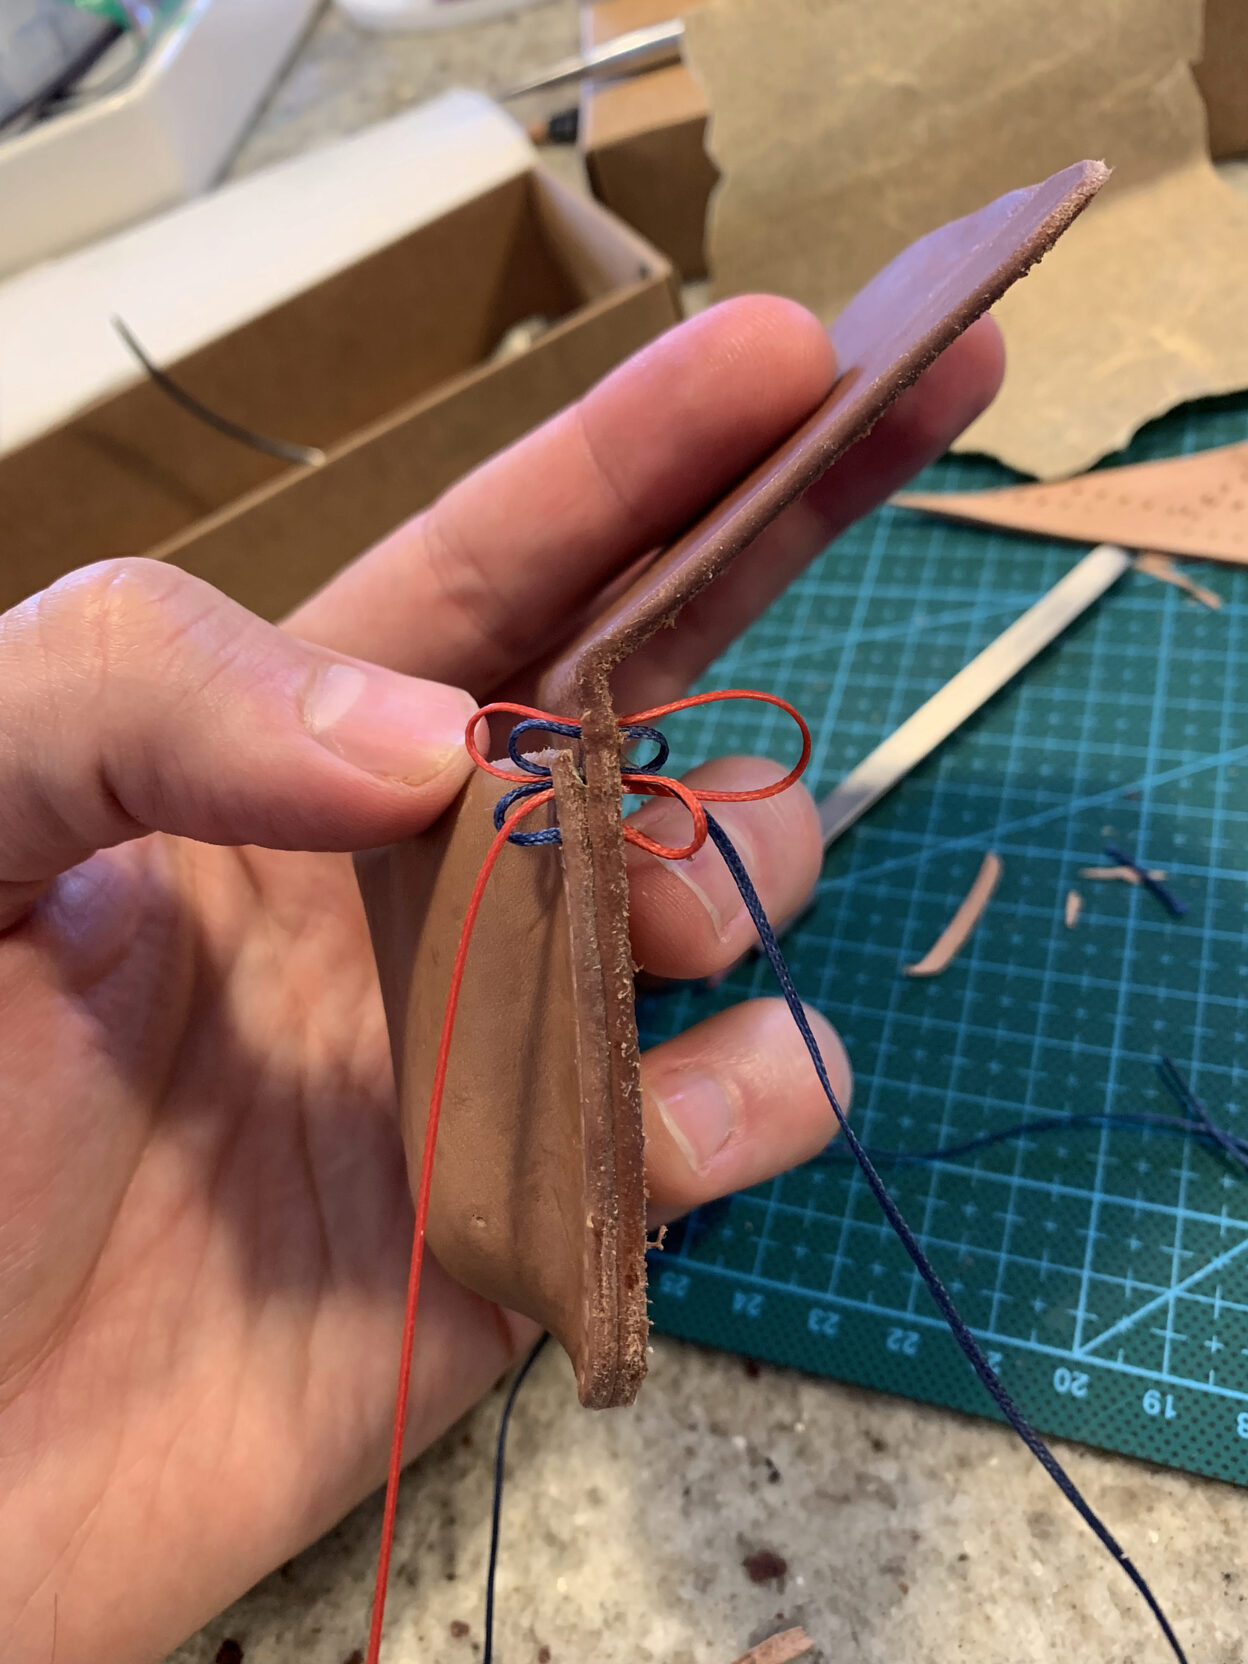
After stitching the top two pieces of leather together on one side, I folded down the back flap and stitched through all three layers across the bottom of the case, forming a secure attachment for the belt loop.
For the alternating color scheme I was going for, I carefully counted how many stitches it would take to make it all the way around the case. I wanted to figure out how to make the stitching symmetrical, and due to the way things added up, I broke the standard saddle-stitch pattern and repeated two red stitches in a row on the bottom, allowing the colors on both sides to match.
Thoughts After Two Years
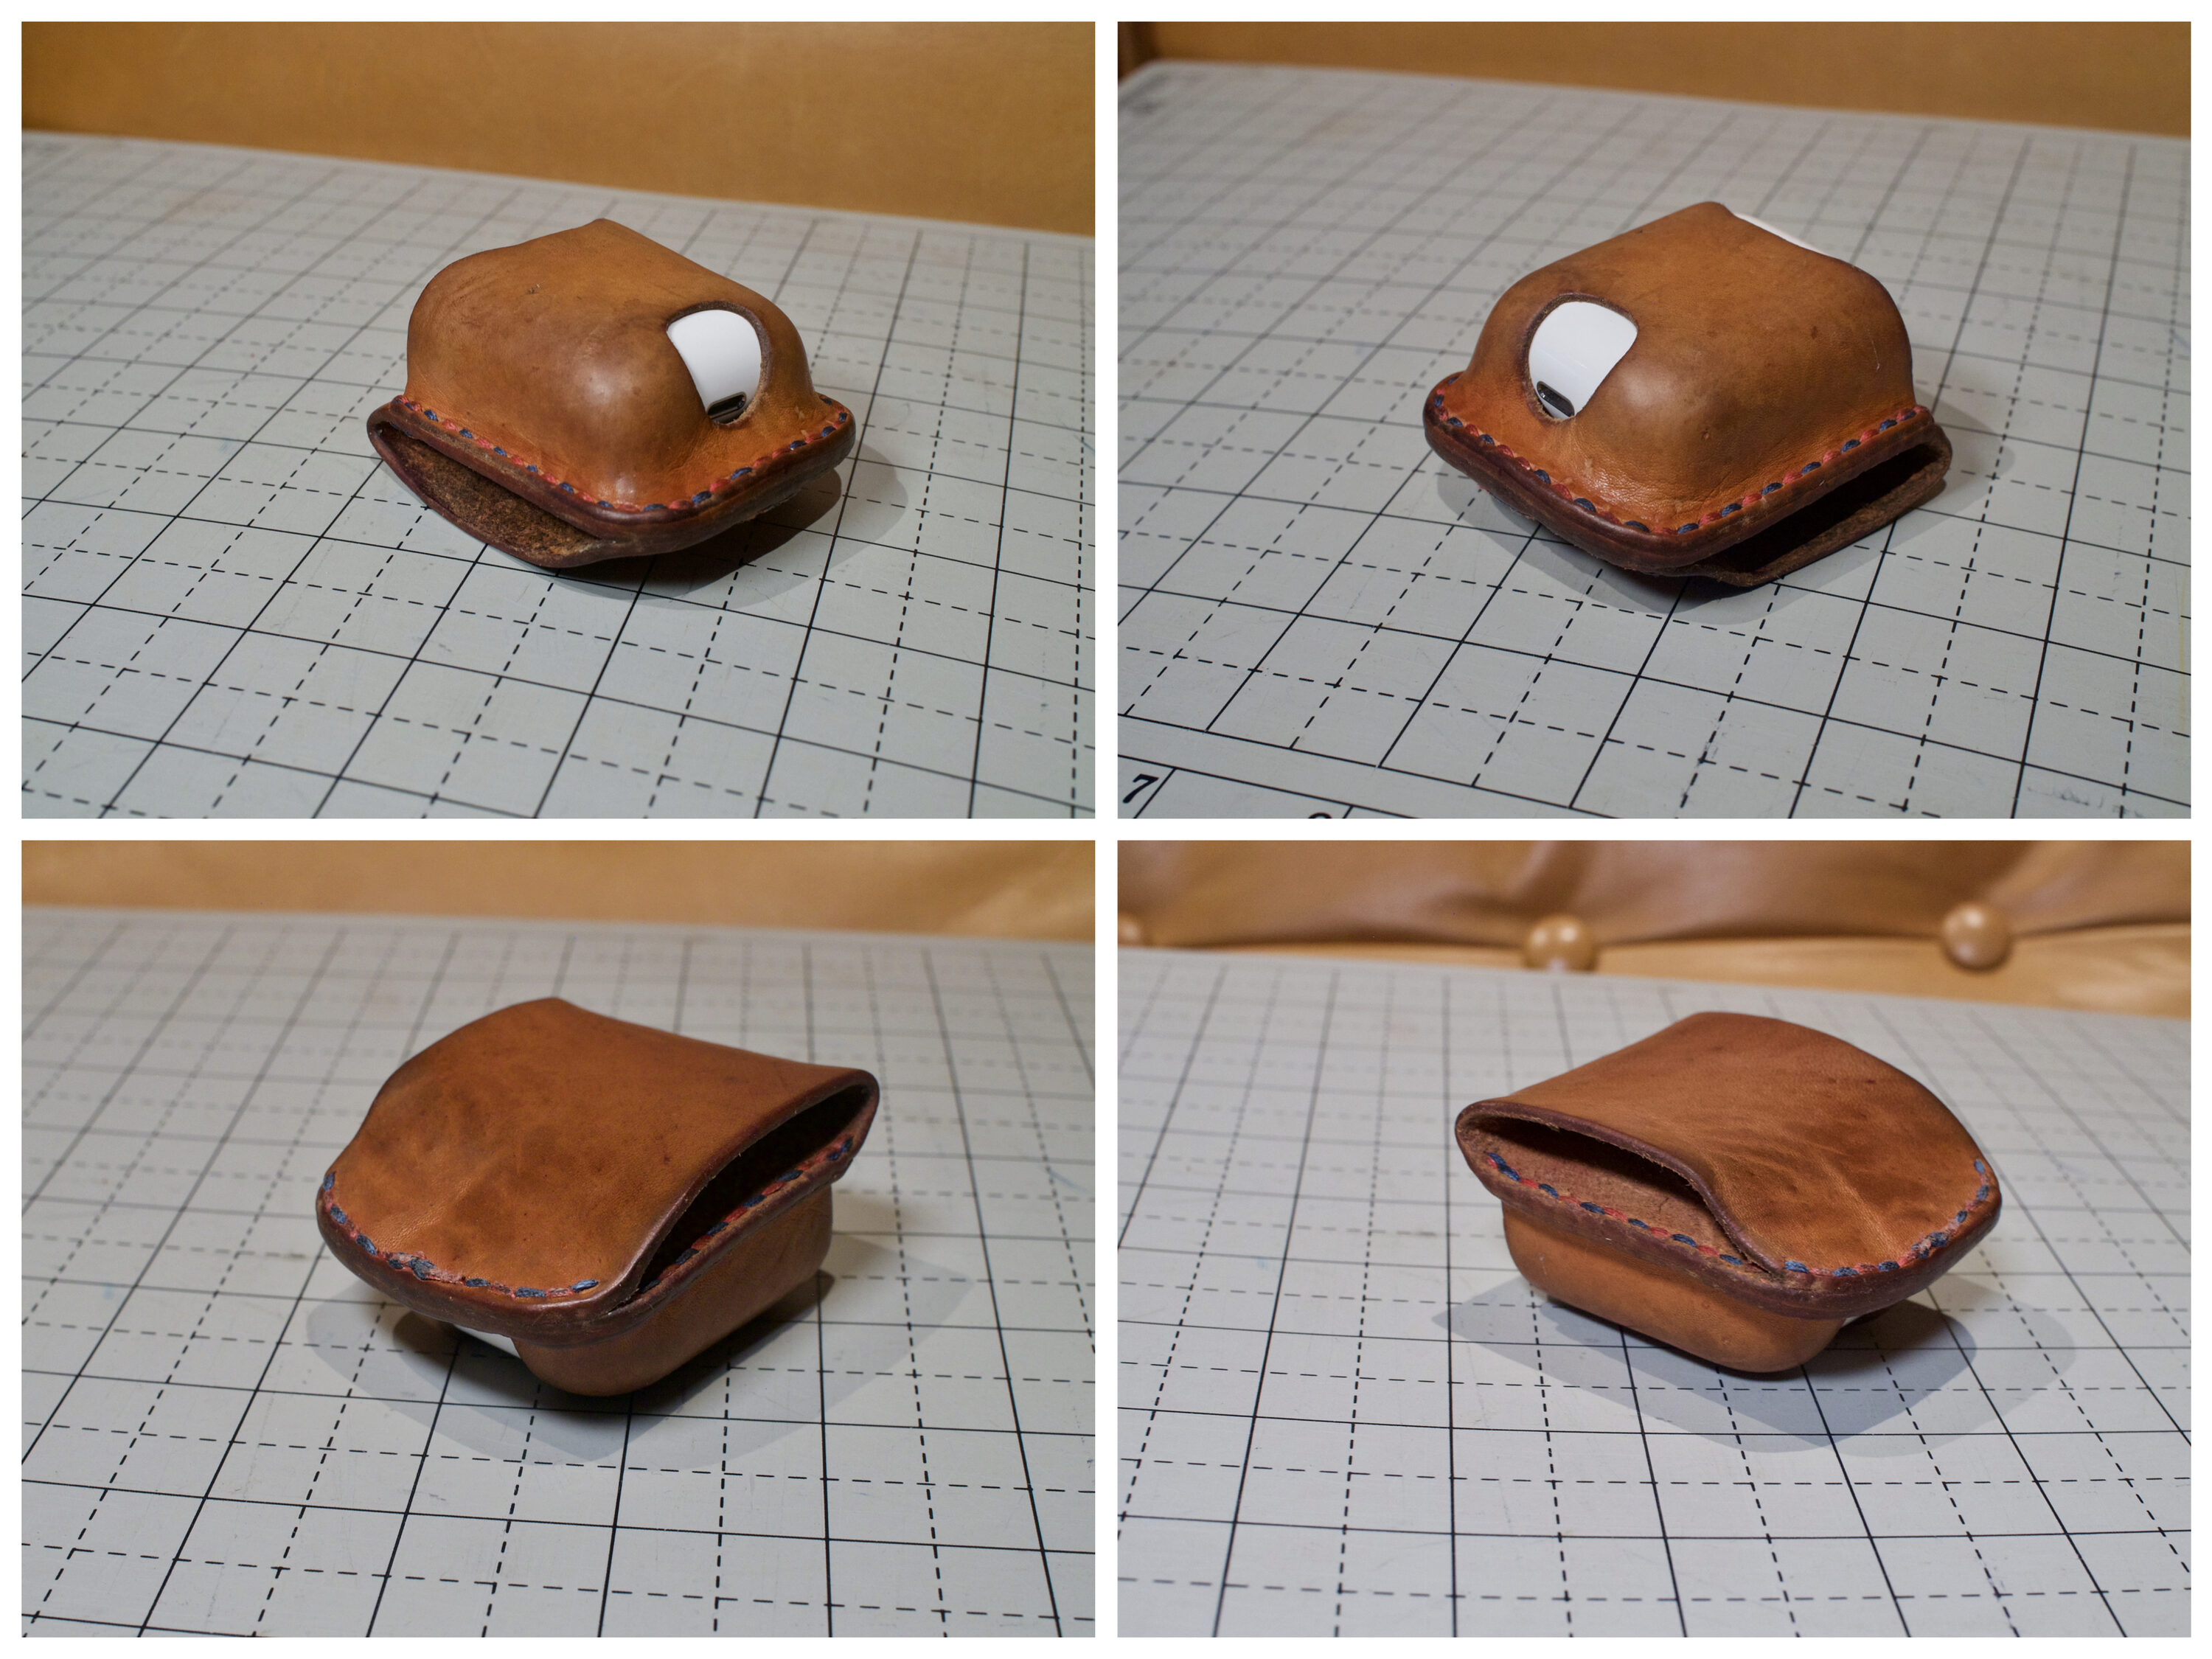
These pictures are taken about 26 months after I made the case, and I love the character that the leather has taken on.
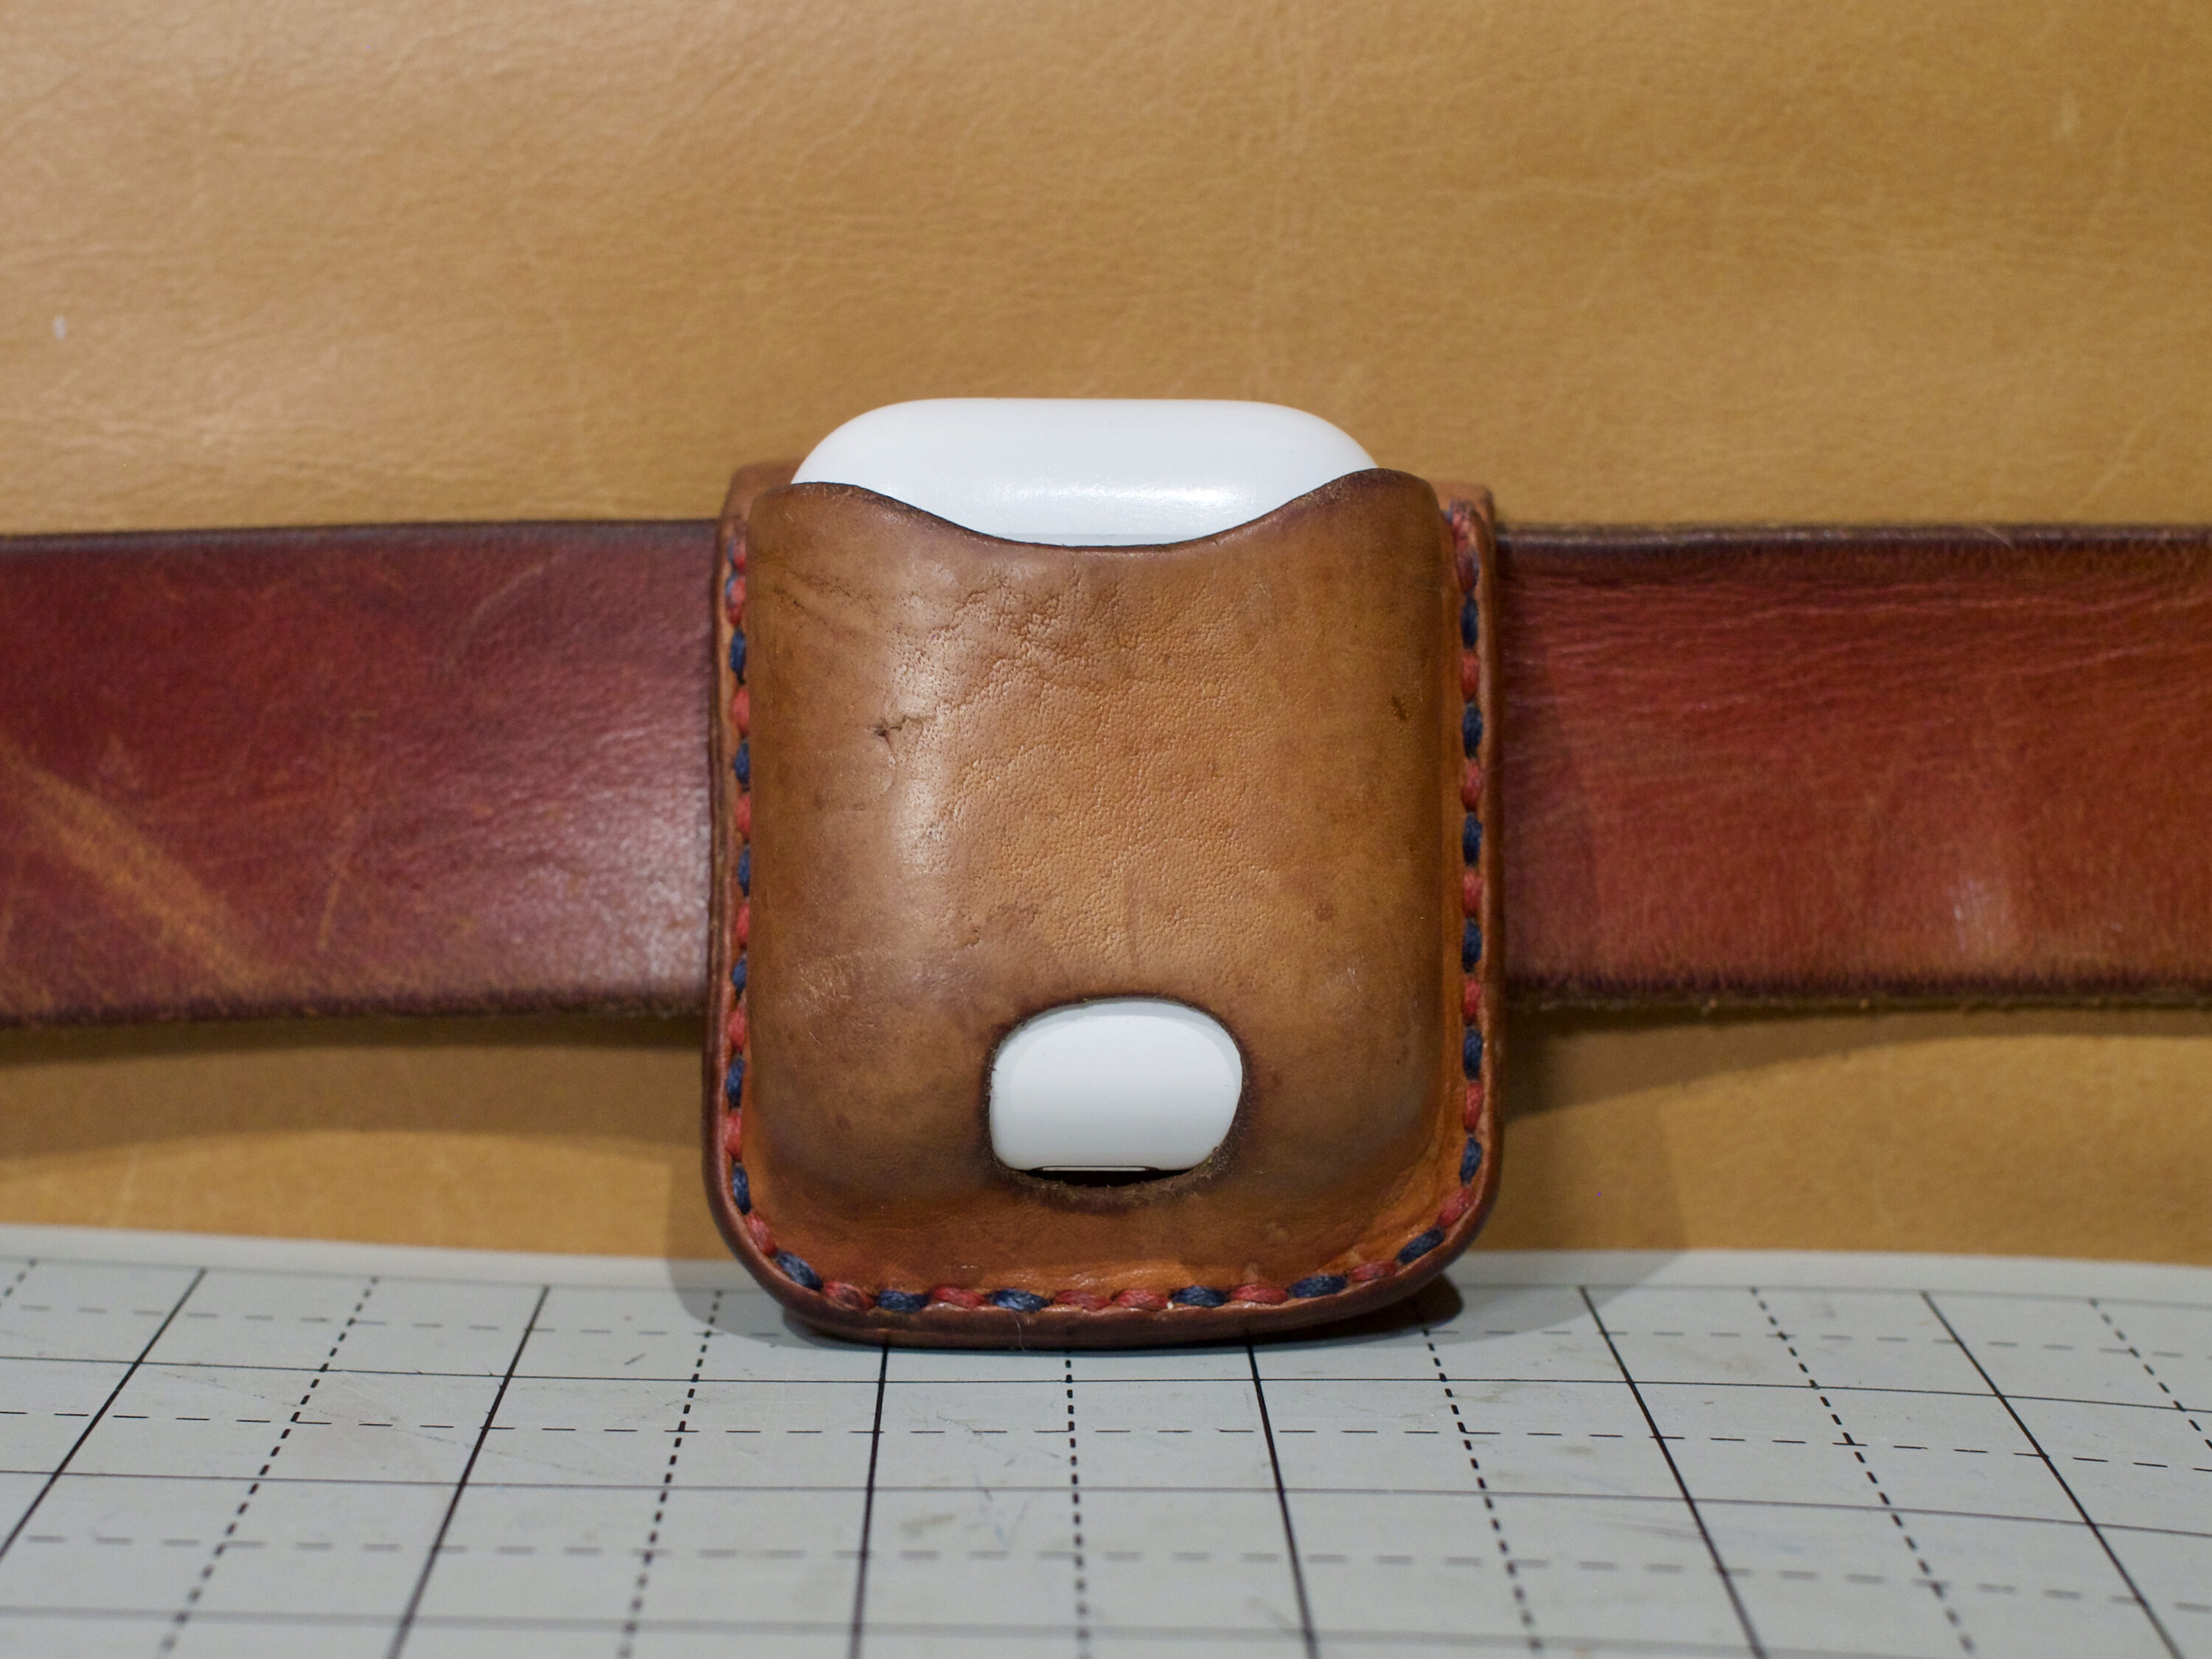
I’ve worn this thing just about daily since I made it. I quite like the design overall. It has been sturdy and has held up well through daily life, including being climbed on and yanked around when I am spontaneously attacked by small children.
One problem is that the leather has stretched out over time, naturally. I’ve dealt with this by cutting an insert that I slid in behind the AirPods, and that has tightened up the fit again to be nice and snug. When the fit isn’t snug, they can easily get knocked out of the holder, or pop out when running. But when the fit is tight, it’s really not an issue at all.
Functionally, I love the open-top design, as it really makes the AirPods easy to access and put back.
Materials Used:
For thread, I use 0.8mm Ritza “Tiger” thread, which is excellent. You can buy it in small quantities from resellers that purchase large spools and resell small amounts. I found some colors on Amazon, and there are also distributors on eBay and Etsy.
I like to use Neatsfoot Oil on most of the items I’ve made with Leather. It does darken the leather a bit, so it’s a good idea to test on a scrap before committing, but I generally like the look of it.